How to draw a mug
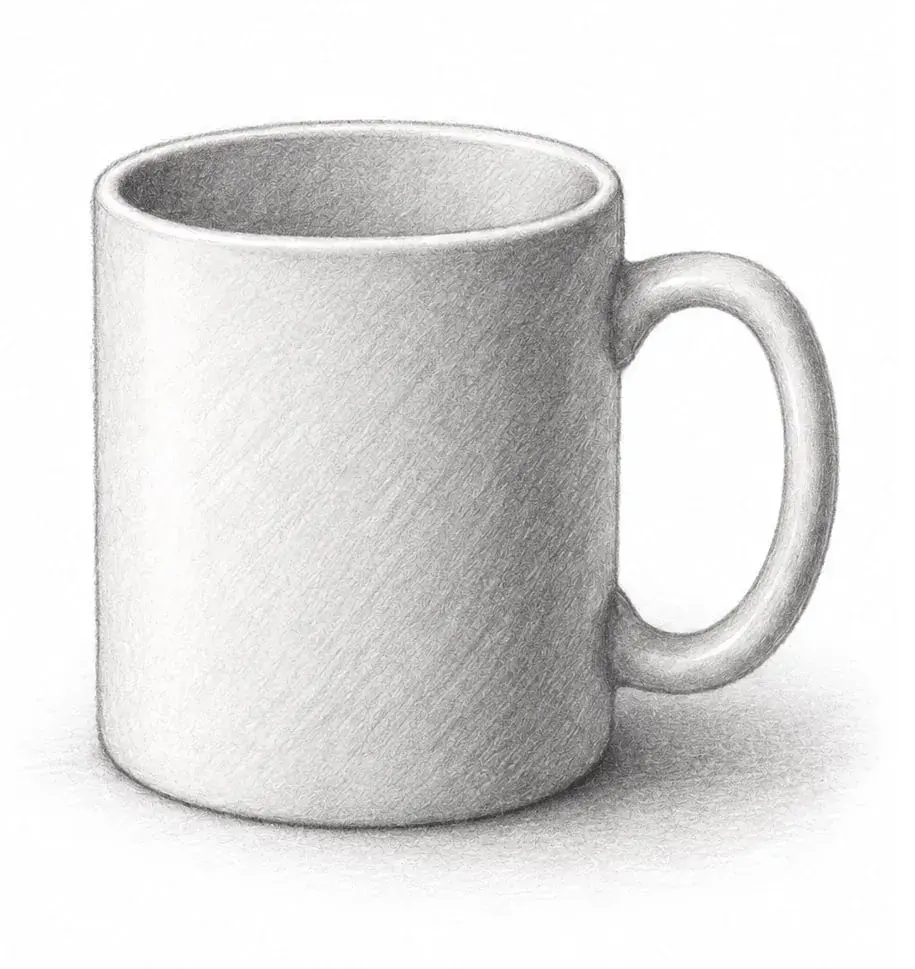
A mug teaches ellipses and straight walls, two things every still life needs. These four short stages take about eight minutes and end with a shaded side and a soft shadow.
- Pencil sketch
- Beginner
- 8 min
- 4 stages
Draw on paper with any pencil or pen. Compare each stage with the guide before you move on.


Stage by stage
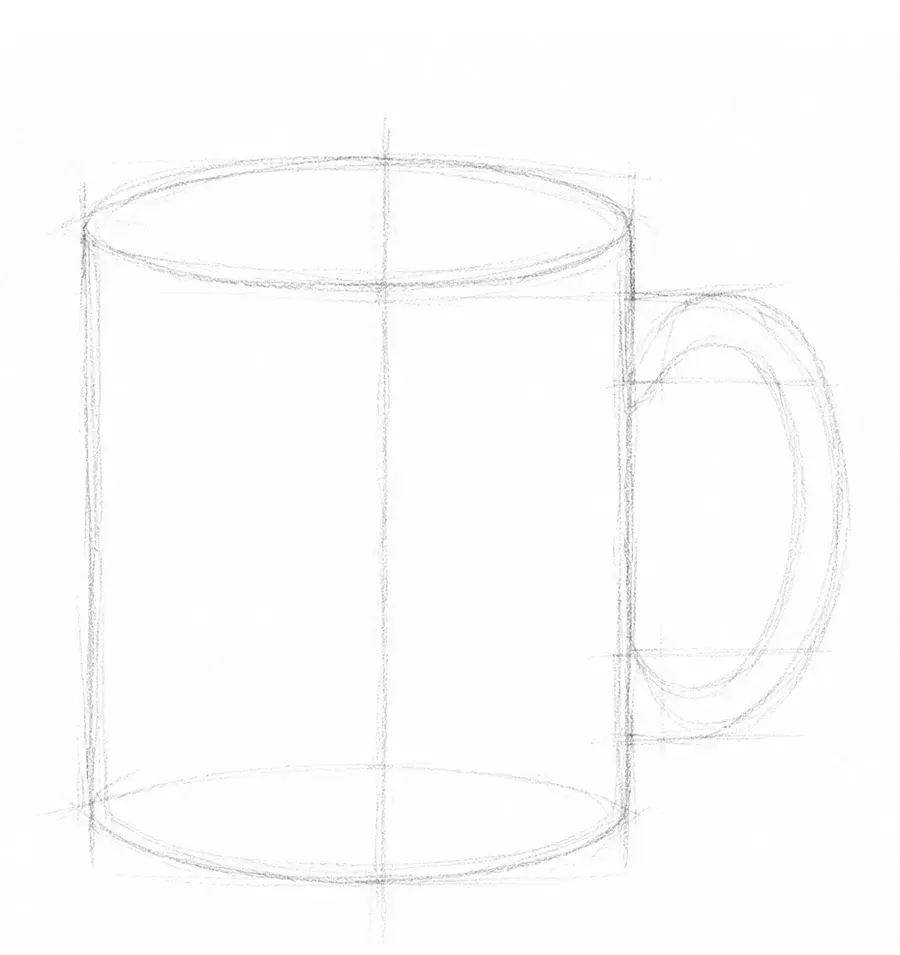
Block in the mug
Lightly draw a box for the body, an oval on top for the rim and a loop on the side for the handle.
Check before you move on: Is the oval centered on top, and is the body about as wide as the oval?
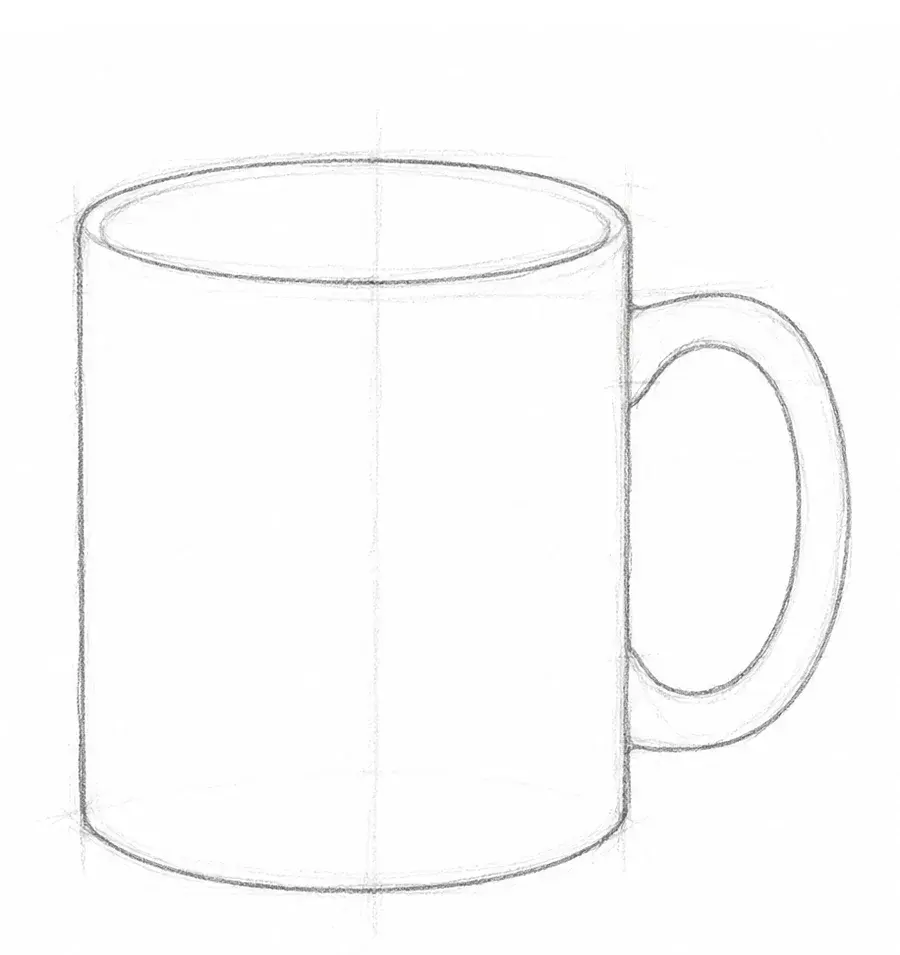
Draw the outline
Trace one clean outline over your light shapes: the rim, the two straight walls, the curved base and the handle.
Check before you move on: Are both walls straight and the same height?
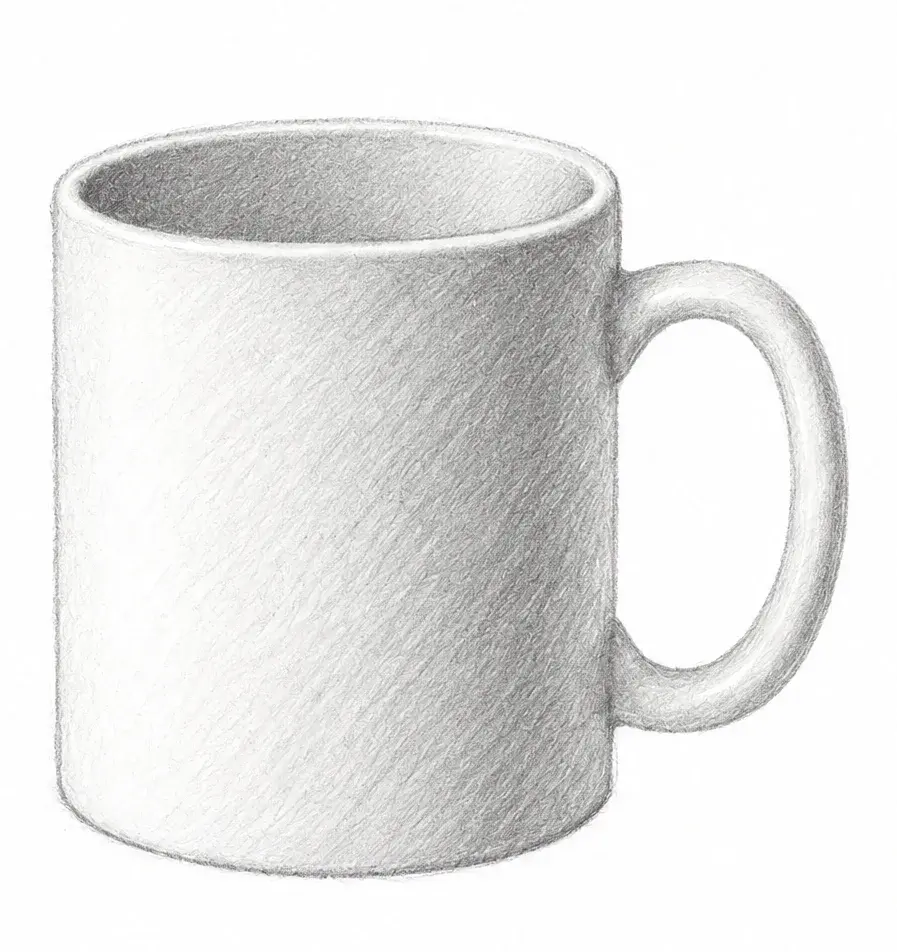
Shade one side
Shade the right side with light diagonal strokes and fill the inside of the rim with a soft gray.
Check before you move on: Is one side clearly darker than the other?
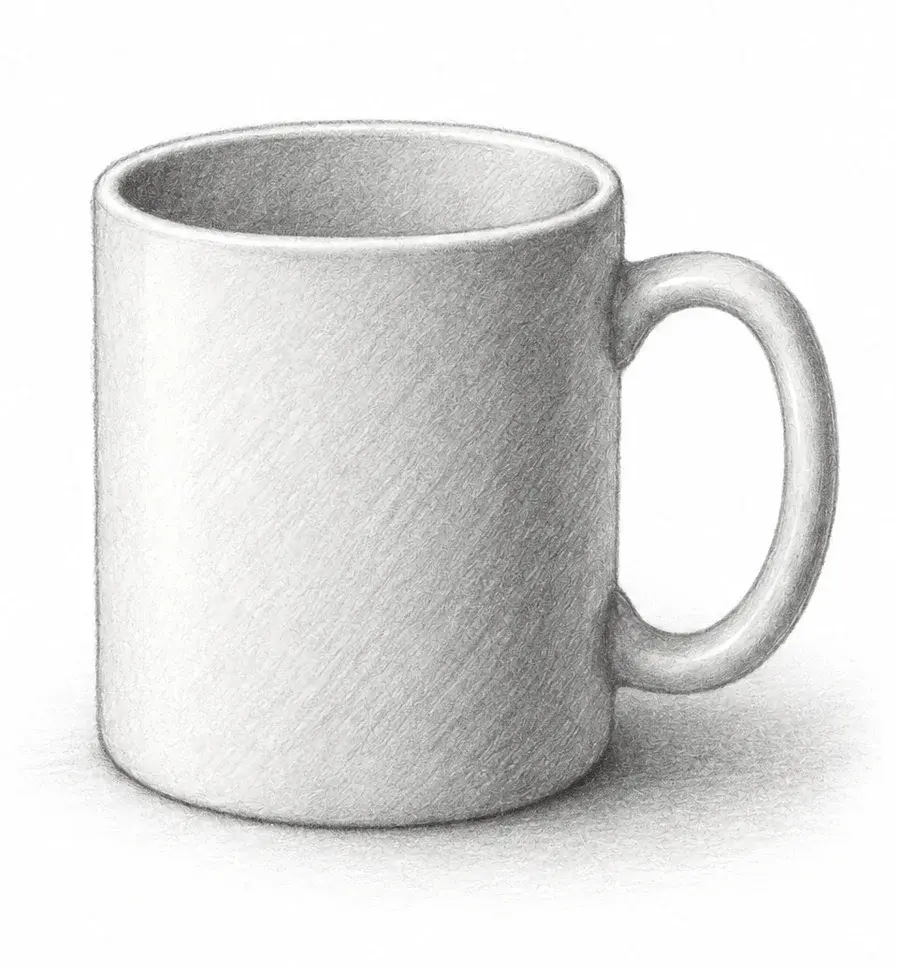
Ground the mug
Add a soft shadow under the mug and darken the lines where the handle meets the body.
Check before you move on: Does the mug look like it is sitting on a surface?
Tips for this drawing
- Center the oval on top, and make the body about as wide as the oval.
- Keep both walls straight and the same height before you shade.
- Shade one side only, then add a soft shadow under the mug so it sits on a surface.
Make a lesson like this from your own photo
Sketchwise builds a guide image for every stage, checks your page along the way and scores the finished drawing.